Maybe it’s creativity. Maybe it’s being cheap. Maybe it’s insanity. Whatever the reason, as soon as I saw the old Schwinn hidden among the tattered sofas at Goodwill I knew it was destined to be my new ride. For 25 bucks, it was atop my bike rack — complete with imperfections, disintegrating tires and a flaking paint job. The Schwinn wasn’t in such terrible shape. It had wheels, pedals, brakes, gears, a seat, all the basic components one needs for a working, usable bike — except that it wasn’t. My mission: to get it out on the asphalt again, back to its natural habitat of road and wind.When snagging a cheap bike from a garage sale to make it roadworthy, make sure to check out the bike carefully to see if it’s worth your time. Simple, right? If it looks like a total heap of junk, it is. Chris Rice-McClure, a bike tech over at REI, recommends looking for signs of bending or flexing in the frame like chipped paint or a bent fork. Look at it from the front and make sure the frame is straight and the wheels aren’t full of curves. Also, check that the mechanics of the brakes and shifters work without any crunching or grinding — silence, he says, is what a bike perfectionist loves to hear. If you aren’t sure what needs fixin’, take it to a local bike shop for a diagnostic inspection.My Schwinn passed the test and was stripped down and manhandled in a parking space at my apartment complex. I was going for the cheapest option — do most of the work myself. Rice-McClure says any bike bought secondhand should be taken into a shop for a tune-up. Cheaping out when it comes to my safety is not an option, so paying a little extra for the professionals to do the really technical stuff was a no-brainer. I could replace the tires, tubes and brake pads, lube up the chains and cables and make the bike look pretty. Rich-McClure suggests using a book on the subject like The Haynes Bicycle Book or the Park Tool website, www.parktool.com, as a guide when doing your own maintenance.As for the pretty part, the cheapest way to give a bike a new coat is with a can of spray paint. I taped up everything silver and sprayed my red bike copper. It was simple, but took a lot of prep time and attention to detail. Once the paint dried, it was time to put the whole thing back together. Originally, I wasn’t going to replace the brake and shifter cables since they weren’t frayed or snapped, but once I took the derailers and brakes off, replacing them was the smartest thing to do. I also replaced the bike chain, which was a bit rusted and in good shape — but without the right tools to remove it intact I had to resort to breaking a link to get it off my bike. That raised the total cost a bit, but it (hopefully) eliminated the need to replace the parts in the near future.Painting and repairs took nearly 12 hours, but learning how my bike operates was worth the time. Plus, the cost for a complete overhaul can range between $80-$120 at a bike shop, not including parts. The total cost for my new toy, including parts, spray paint and a tune-up with Rice-McClure, was $155.My thrift store bike is a road warrior once more. The Schwinn will never be my bike-of-choice for a 100-mile ride, but it sure will be sweet along the bike trails of Burque.
Dust Bunny To Road Warrior
An Old Schwinn's Journey From The Thrift Store To The Bike Lane
4 min read
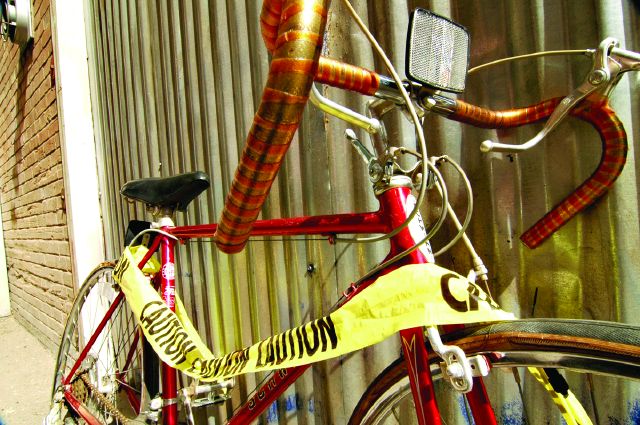
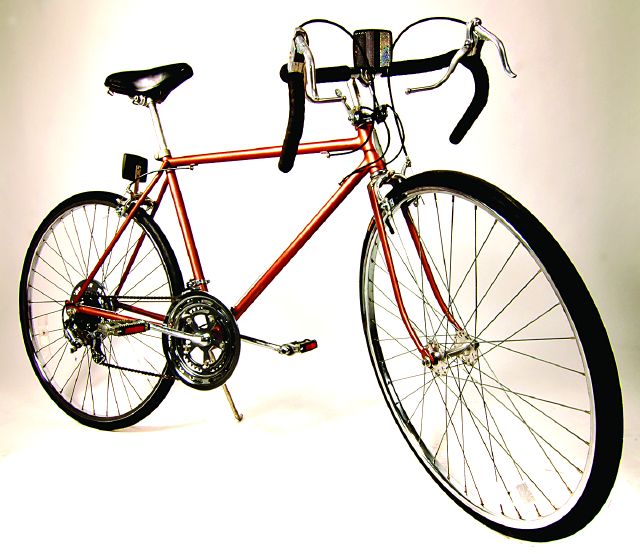
After a fresh coat of paint, new tires and a tune-up, this old Schwinn is young again--and perfectly safe.
Wes Naman